I know its not just me when I say that cables (or wires or cords, whatever you want to call them) hanging all over the place is one of my biggest home design pet peeves. Thankfully, I’ve come up with a simple solution that means we can still access everything easily but I don’t have to look at a huge mess of wires every time I walk into the room.
This literally took me a less than an hour and didn’t cost me a single penny – I knew years of art history classes and learning about trompe l’oeil would come in handy at some point!
Before I get into how I did it, I wanted to explain why we had all those wires wrecking the look of my recently refreshed living room.
We’re slowing replacing all of the electrics in the house for each room (we’re about halfway through right now) and as we’re working on each space, I’m trying to determine where I can put the plug sockets so that any cables are hidden when anything is plugged in. I made a slight error in the bedroom (the first room we did). There are plug sockets behind the two bedside tables and one behind the chest of drawers but I forgot to include one that was more accessible so that I can easily plug in a hoover. Whomp whomp.
I learned my lesson rather quickly, however, including plenty of sockets in the kitchen/diner and planning for any excess cables so that everything was neatly hidden away. I thought I’d done okay in the living room as well, leaving a plug socket in the corner of the room accessible in which only a lamp was plugged in – I managed to hide the single cable well enough. However, it didn’t stay that way.
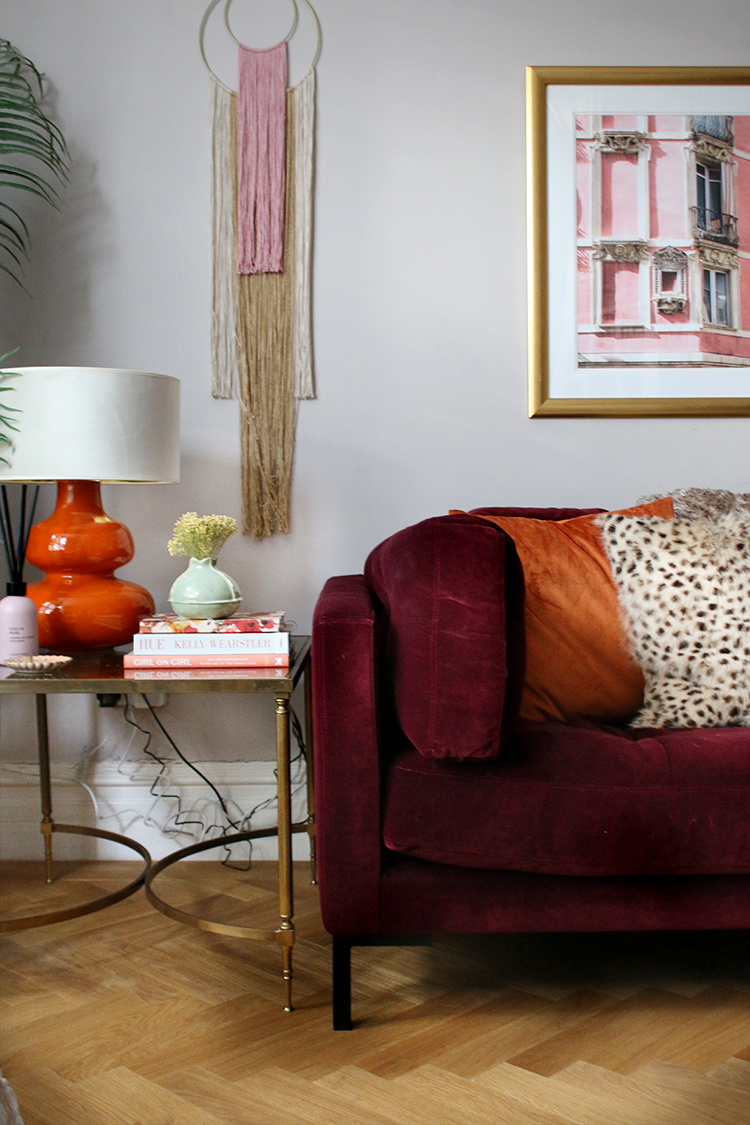
Fast foward a number of months of living here and we finally got fibre broadband installed. (I won’t get into it but just suffice it to say I’d been living with 1997-modem-quality lines for too long!) I had to decide on the spot where it was all going to go as it needed to be near a plug socket. So I made the decision that the fibre broadband box could hang out on the side table in the corner, disguised by a stack of books in front of it. Problem solved. Except, yeah, it wasn’t really.
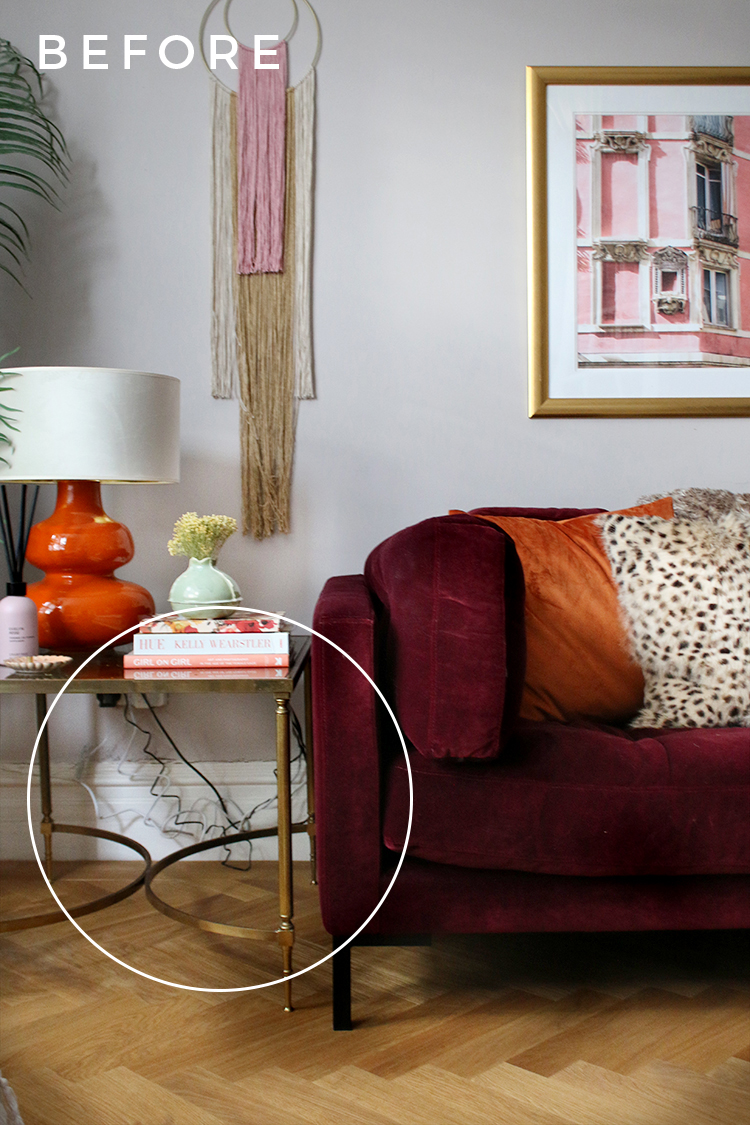
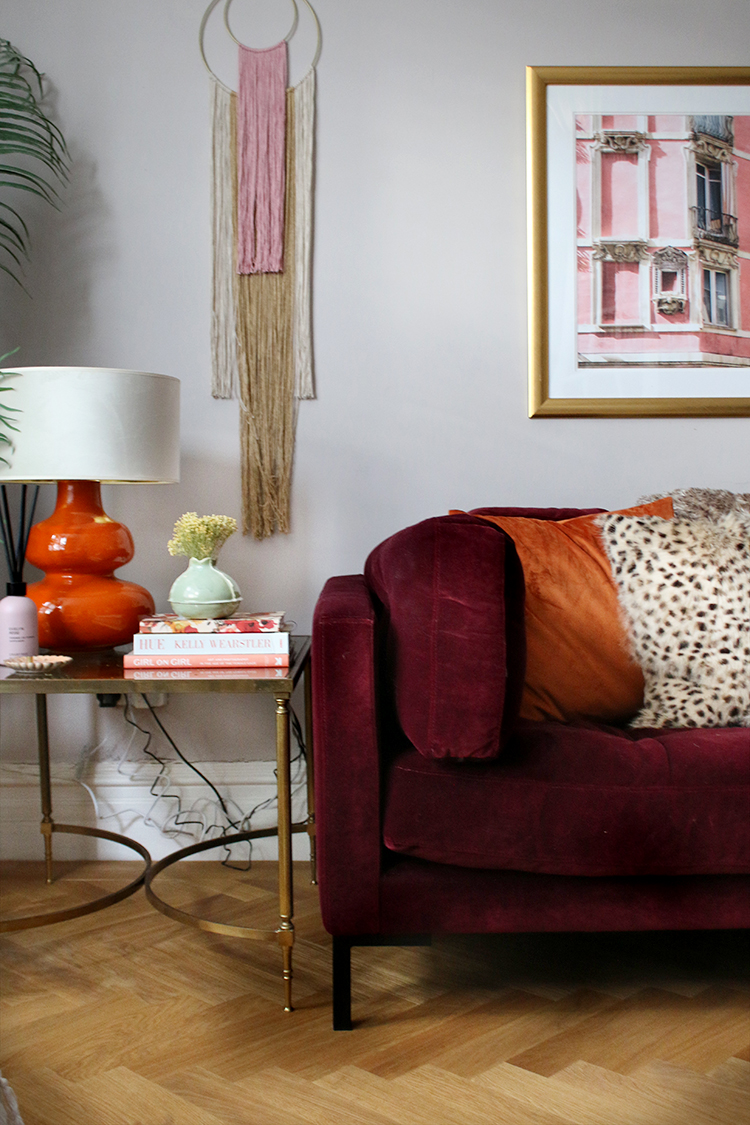
Because, while the box isn’t too noticeable, I hadn’t accounted for the amount of wires and cables that would be hanging down. The table I have in that corner is vintage – smoked glass and leggy dainty legs do not make for hiding cables particularly easy. And my god, there were so many. So many. They dangled down in a big tangled mess in clear view when you walked in the room. I tried to neaten them up a bit, using wire ties to tame them into some kind of organised fashion but they still looked pretty crap. I needed to find a solution to hide them.
Now, in our old house, I had had a similar issue and I resolved it fairly easily at the time.
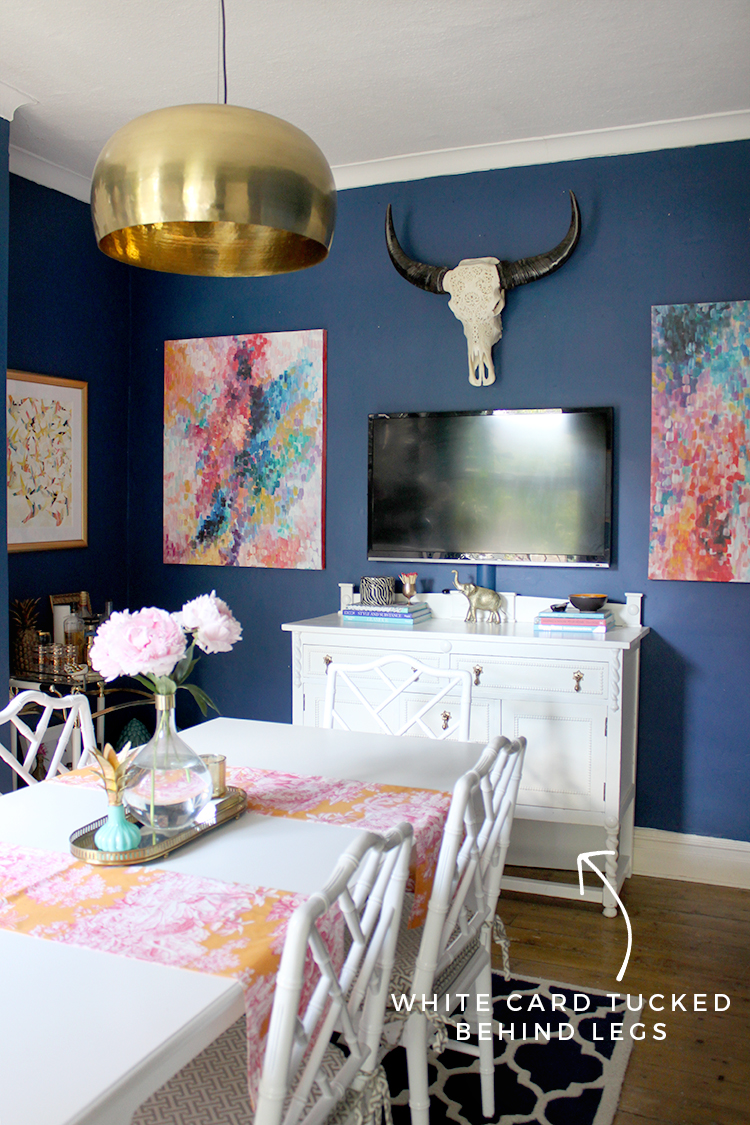
In our dining room (before we completely renovated it), we had a 1930’s sideboard with barley twist legs over which hung a TV. The plug socket was clearly visible under the unit as the legs were long and the mass of cables hanging behind it did my head in until I figured out I could just put a long piece of thick white card behind the legs, tuck the cables behind and call it done. It might not have been the most elegant solution but it worked pretty well (no one ever noticed it as the white card blended with the high skirting boards) so I figured I’d try it again with a slightly updated method.
Now there are lots of ways to hide cables but the position of all the cables and connections and the fact this table had really skinny dainty legs and a glass top made it difficult for me to tuck them out of sight, even using things like cable ties etc. I also do move the table on occasion for photoshoots and the like and it would have been really annoying to have to untie and re-tie everything up any time I needed to pull the table away from that corner for any reason. So here was my solution…
How to Hide Cables with Card
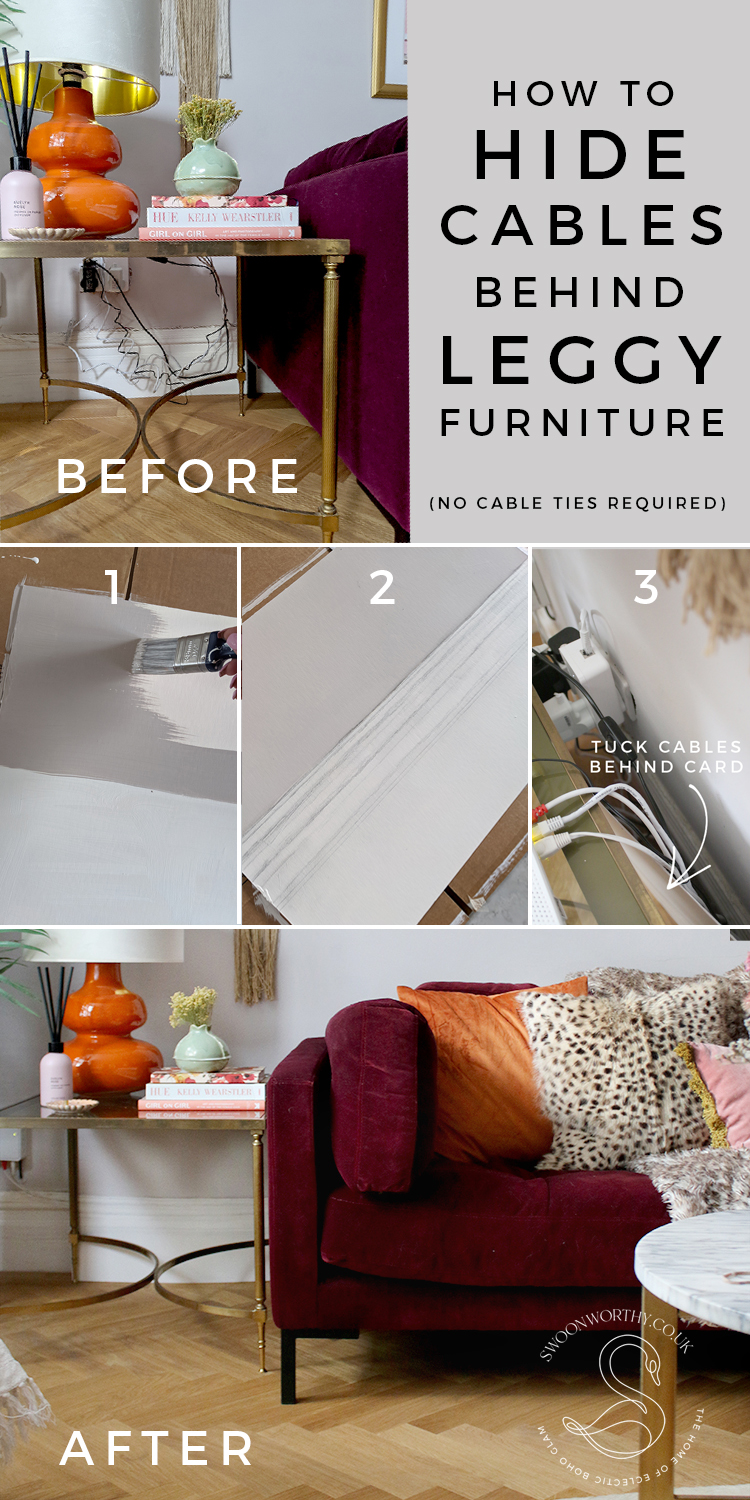
Step 1: My first step was to loosen all the cables from the ties I had already put in place so that they could easily drape behind the table.
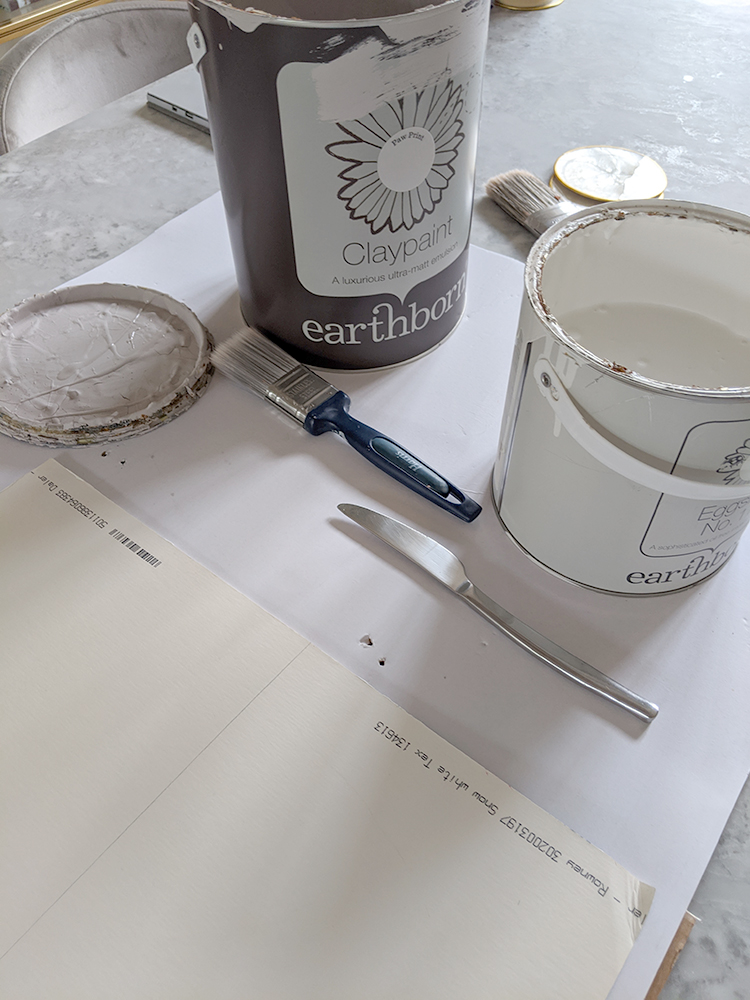
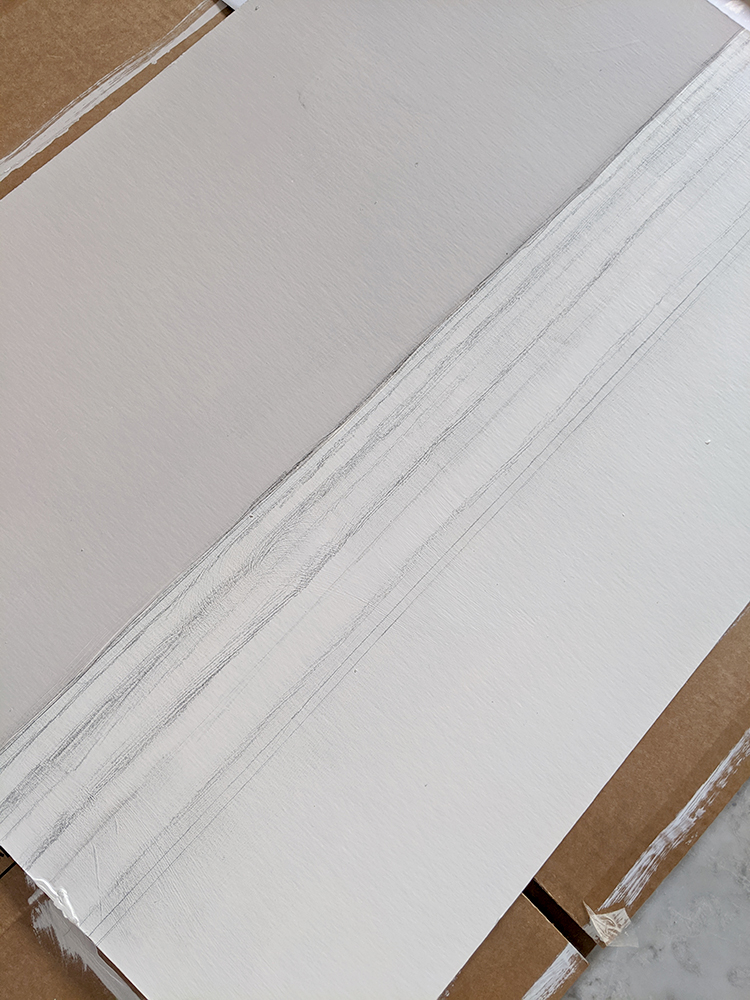
Step 2: I then took a bit of thick white card I had hanging around. I made sure the size of the card was roughly wider than the width of the legs and roughly shorter than the height of the table. I then measured the height of the existing skirting board from the floor and made a line on the card from the bottom of the card to this point and drew a straight line across the card with a pencil.
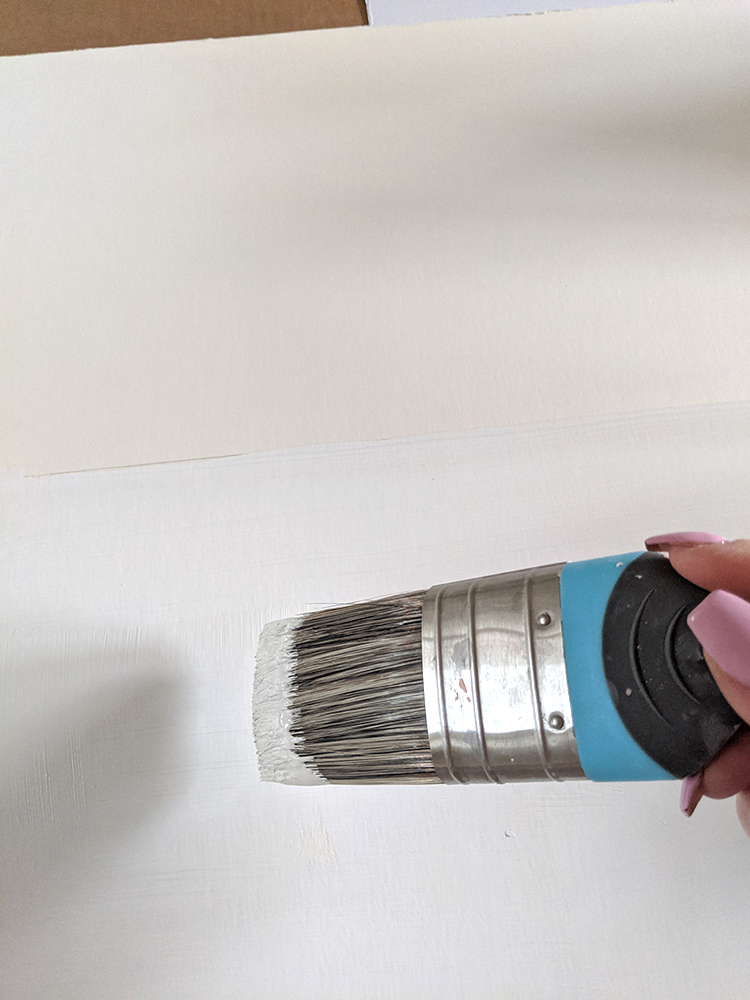
Step 3: I painted the bottom of the card (below the line) with leftover paint we used on the skirting board (Earthborn No 17 in White Clay).
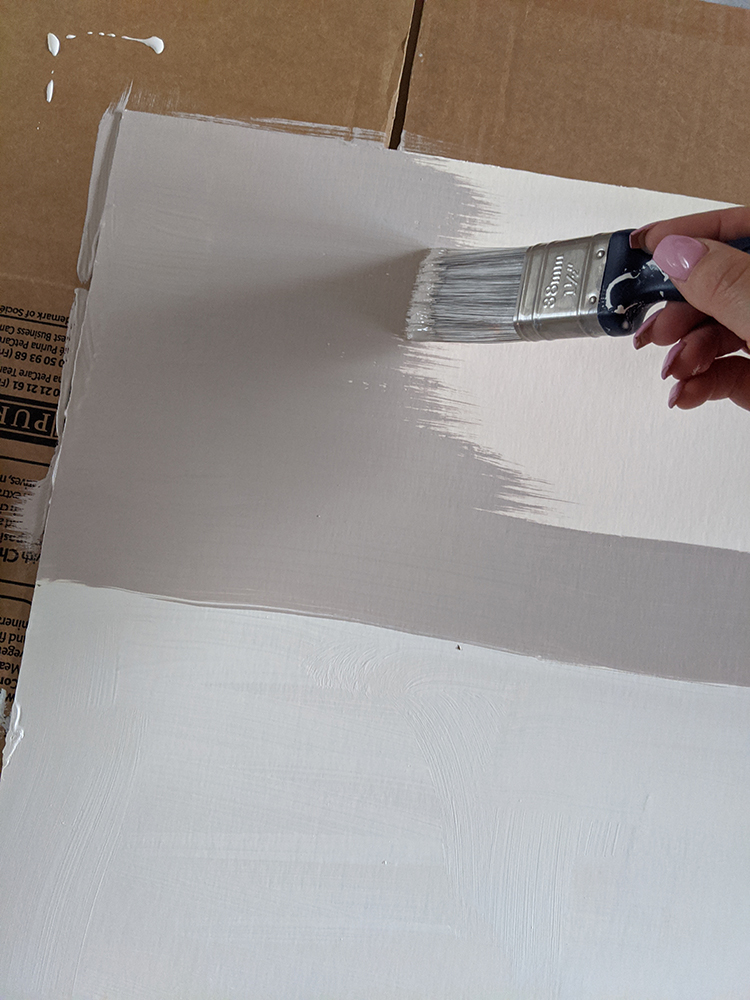
And then painted the top of the card (above the line) with leftover emulsion from the paint we used on the walls (Earthborn Claypaint in Paw Print).
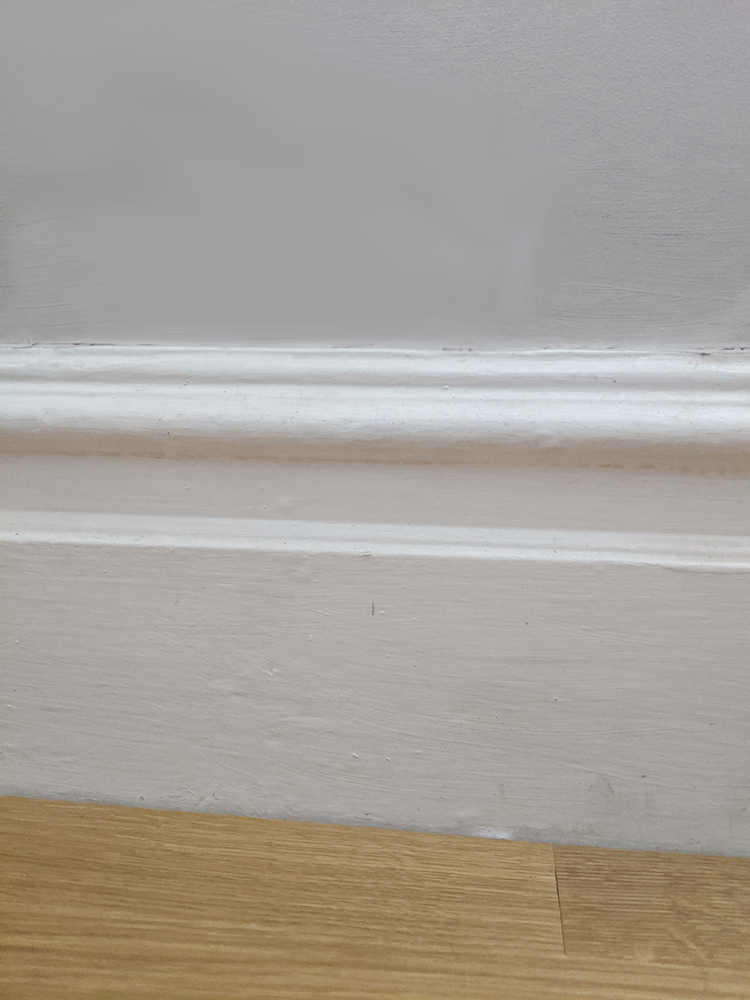
Step 4: I then took a picture of the skirting board so I could see where the shape of the skirting board created shadows.
Using a ruler, I lightly sketched some rough pencil lines across the card to match where the darkest shadows were cast and then lightly shaded until it looked kind of similar to the picture I took. Again, as you can see from my drawing, it really doesn’t have to be that detailed or perfect. I then took my finger and lightly rubbed along the pencil lines to blur them a bit, making those shadows look just a little softer and more realistic.
Obviously, if you have a more contemporary property or one without detailed skirting boards this is even easier but please do bear in mind you don’t have to be a skilled artist in any way shape or form to do this. I’m certainly not as you can see!!
Step 6: I gathered some of the wires together with a couple of cable ties just so that I can easily move them – I tied them just behind the back of the table and lower down towards the floor. This probably isn’t necessary, it just made it easier to handle them all!
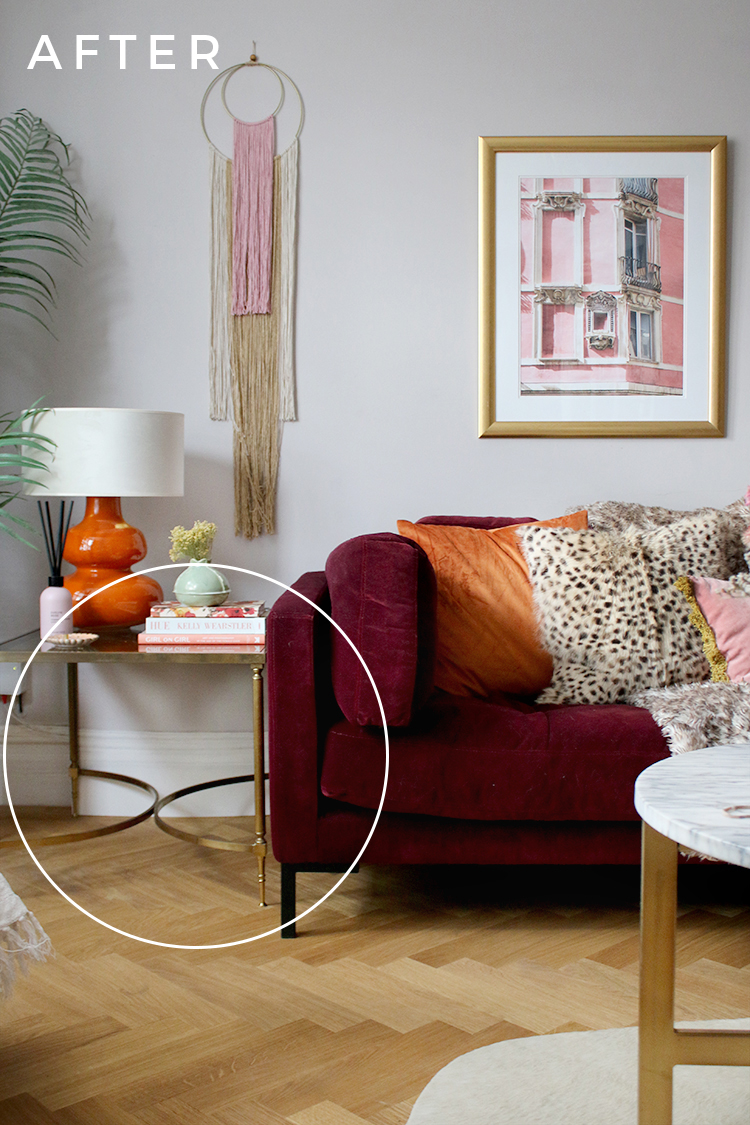
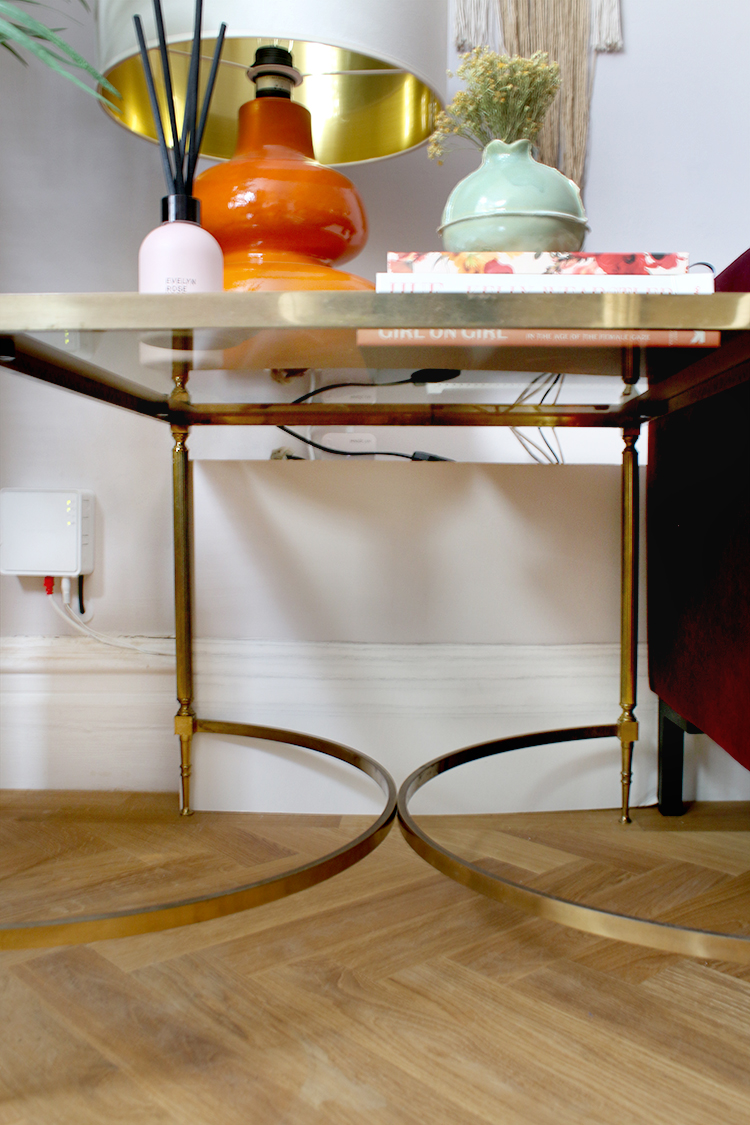
And then simply tucked the card behind the legs of the table allowing all the cables to hang between the wall and the card. And that’s it!
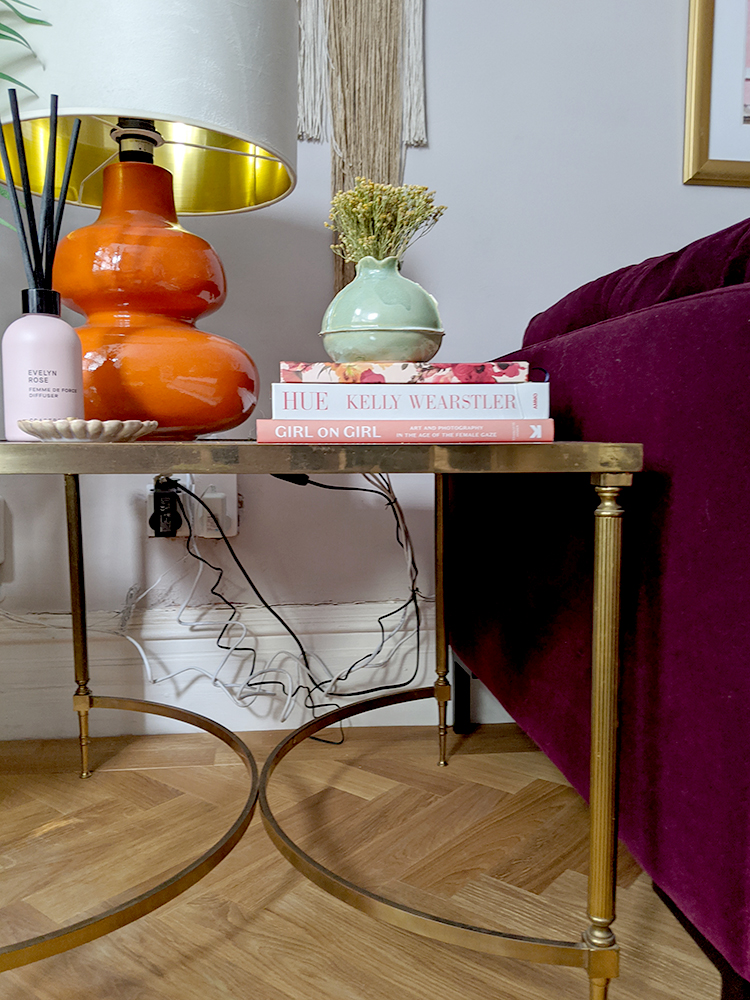
Now I was literally sat on the floor to take this picture (which I’m pretty sure wouldn’t generally ever happen when you are sitting in your living room!) but I just wanted to show what it looks like from below. No one will ever see it from this angle obviously! ;)
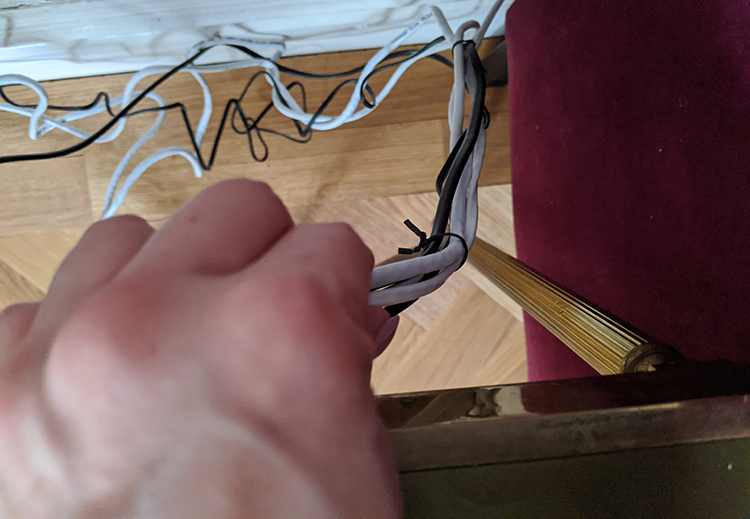
And it’s a damn sight better than this view!!
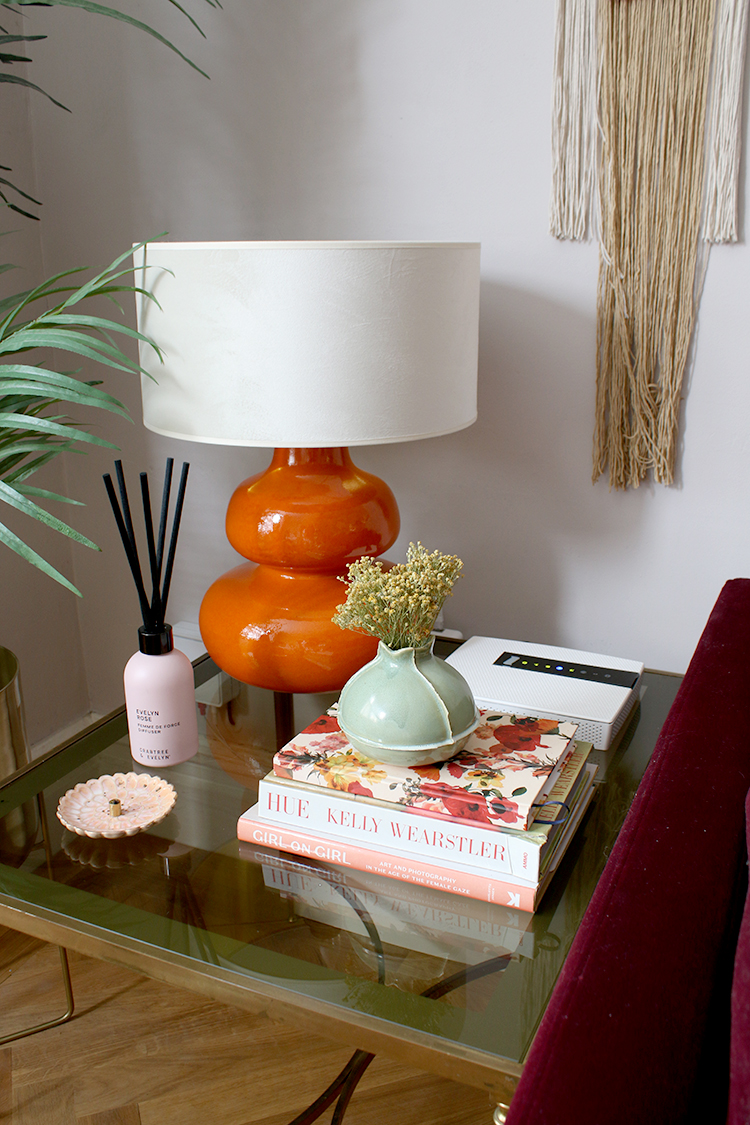
From above, you can see the cables aren’t really visible. Wayne won’t let me cover the broadband box in any way so a strategically placed stack of books does a pretty good job of ensuring it’s not easily noticeable when you are in the room.
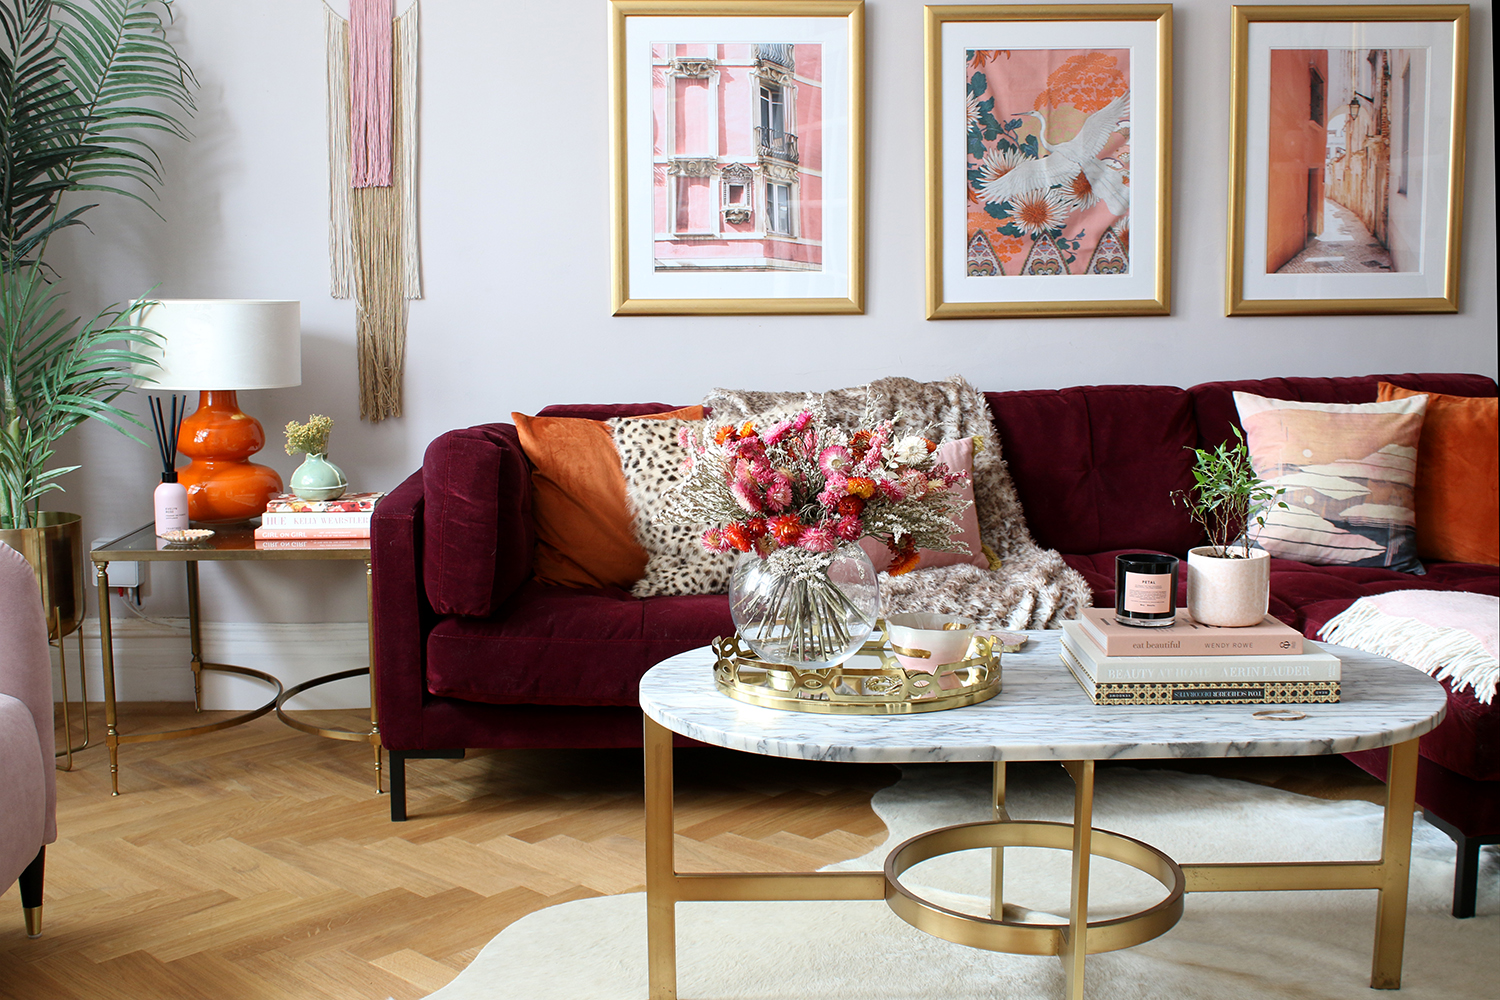
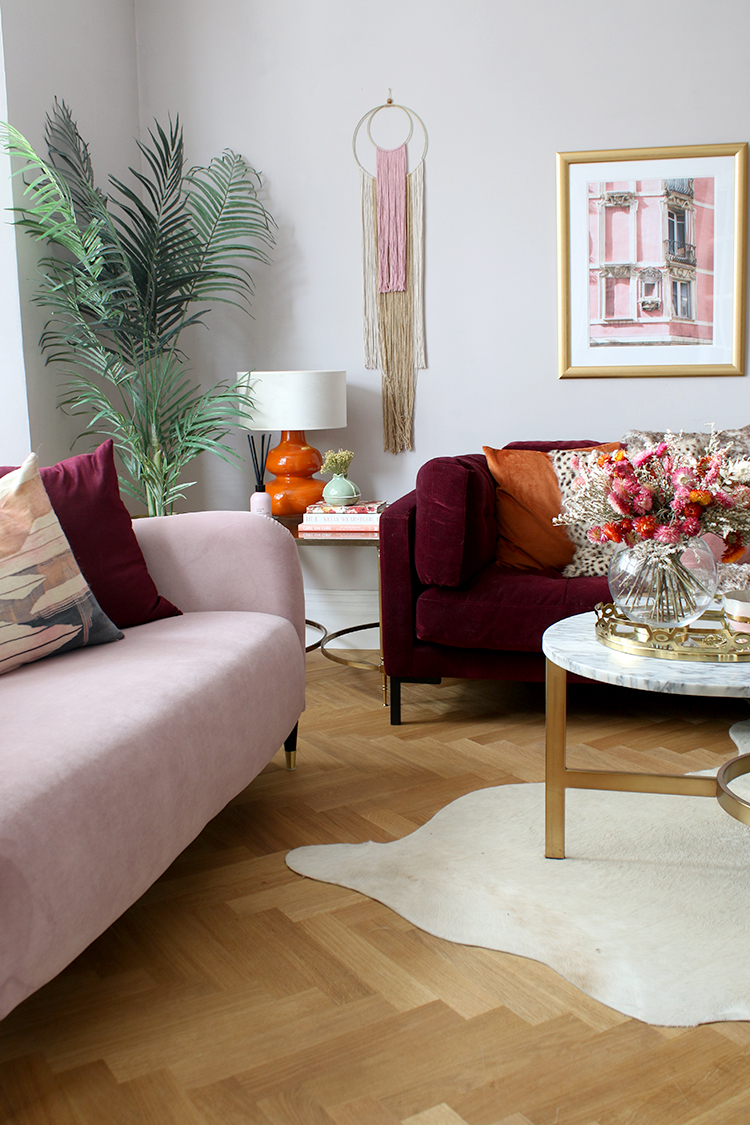
Most people will be looking from around this vantage point or higher where there’s not much visible! Now, yes, you can still see the small white broadband box in the corner (which doesn’t actually bother me terribly). Notice the cable ‘disappears’ behind the card. However, it’s only easy to see here because I pulled the pink sofa out of shot a bit so you can see the whole thing better.
But this is actually what it looks like with the pink sofa pulled into its usual place – virtually impossible to tell there are any hanging cables there or that there even is a painted card there – it just looks like the wall!
I have to say, I’m really so happy with how simple this was to do. It cost me no money at all (I had the card and paint knocking about already) and about 10 minutes of ‘hands on’ work or just over an hour, simply waiting for the paint to dry! But the end result makes me happy every time I walk in the room now, knowing those messy cables are no longer annoying me ;)
I’d love to know if you have any messy cables in your own home that you might try this DIY out on? Let me know what you think of this option and where you’d use it in the comments below!
Pin this for later!






Ooh, I like this! It definitely wouldn’t work everywhere, but where it would it’s so simple!
Ahhhh… nice trick!! I always wondered those things
How clever you are! I will definitely be using this idea.
This is so simple yet so effective! Only problem I have is that my router wire goes about 2m due to the location of the plug vs. the telephone port bit. Back to the drawing board! Love the orange lamp too!
So simple but works a treat, before you said it was card hiding it I never thought it was that!!
A fab idea Kimberly, theres nothing worse than having wires and cables everywhere, and if you didn’t say what you had done nobody would have been able to tell. Xxx
Girl, you are something else. I love this very creative solution!!!
Bloody Brilliant
Genius!!
This is brilliant, so simple but brilliant.
Simple ideas are the best! I wanted my sockets put just above the skirting board to avoid this issue but building regs didn’t allow that, so I just kept them as low as possible. Wires are such an eye sore. My builder thought I was bonkers for wanting so many sockets, but the reality is that ‘everything’ needs to be plugged in these days, and I didn’t want trailing cables and extension leads all over!
What a brilliant idea, so simple and yet so effective.
That was the most creative, brilliant idea I’ve ever seen for dealing with wires. LOVE. IT. You’re da bomb!
So clever! Never seen this idea before!
I have floor sockets in the middle of the sitting room which is great if your sofas are in the centre with side tables and lamps. But this idea is fabulous to hide computer, TV etc. cables all winding together in full view. The French adore seeing pipes and cables all over the house, but I don’t. A must for the next rainy weekend. Awesome idea and thanks.
Omg, this is like so clever! I would never have thought of that. But I will definitely try it!
Thanks for sharing.
Have a lovely day
Renaud
http://blogbyrenaud.wordpress.com/
You are a genius. The end.
x
You clever, clever girl! Amazingly effective!
This is such a great idea. I’m definitely going to try this in my bedroom where we have a mass of cables under one of our bedside cabinets.
Wow this is cool! Would never had thought of this!
So smart, I have this problem on both sides of sofa and I was thinking what how to solve it
Thank you for such a wonderful idea – it is one that I have needed for months now!
And I love the new look of the blog. That Wayne ain’t too bad, is he? He looks like the lovely man I’m sure he is – after all, he loves you. And speaking of you – great photos!!! You look terrific…and then there is Quito and his little kitty friends. Meisha is so beautiful and she blends so well with Quito – they look great on the furniture! And the gorgeous older black girl – beautiful! Of course, you know I just love that Quito and I’m so glad that you both find him hilarious – the XH and I found all of our Shelties hilarious – they are so human!
Thanks for such a great post – I really needed it and I got to see the whole fam!
XO
Susan